
How to Create a Website in Drupal

Collection :
With one in 10 enterprise websites running on Drupal, it stands as the open source content management system (CMS) at the core of world-class digital experiences. It’s fast, secure, reliable, and can scale with the ever-evolving demands of technological change, making it an optimal choice for businesses seeking to set the tone for digital experience today and tomorrow.
You might be thinking that all sounds great, but that must make Drupal tough to use, right? Not so much. And, to prove it, I’m going to take you through how to create a website with Drupal step by step.
Choose Drupal hosting
Before we get started, it’s important to take a moment to talk about hosting. Proper hosting will ensure the world sees your Drupal website and that it operates without a hitch. When running an enterprise organization with a vast digital ecosystem, making sure that technological infrastructure remains sound is paramount. A few key considerations in choosing a Drupal hosting provider or on-premise self-hosting are:
- Performance and speed
- Security and compliance
- Uptime and availability
- Support and maintenance
Acquia’s fully managed Drupal hosting gives your organization the power to create, control, and publish digital experiences from a single platform. It’s optimized for Drupal and managed by us, so we’ll handle the technical infrastructure in the background, giving you more time to build head-turning content.
But, first, let’s get Drupal onto your machine.
Install Drupal
There are lots of ways to go about installing Drupal, but we recommend following the steps laid down by the Drupal community.
They run through the installation procedures for different operating systems, installation preferences, and required software stacks. All in all, you’ll run a few commands and see an initial Drupal installation page that looks like this:

Here, you’ll choose a language and an initial Drupal profile, then Drupal will install core modules and prompt you to configure your site: name your website, create an admin user, and apply regional time settings, etc.:

Once you’re done here, continue to your installed Drupal site.
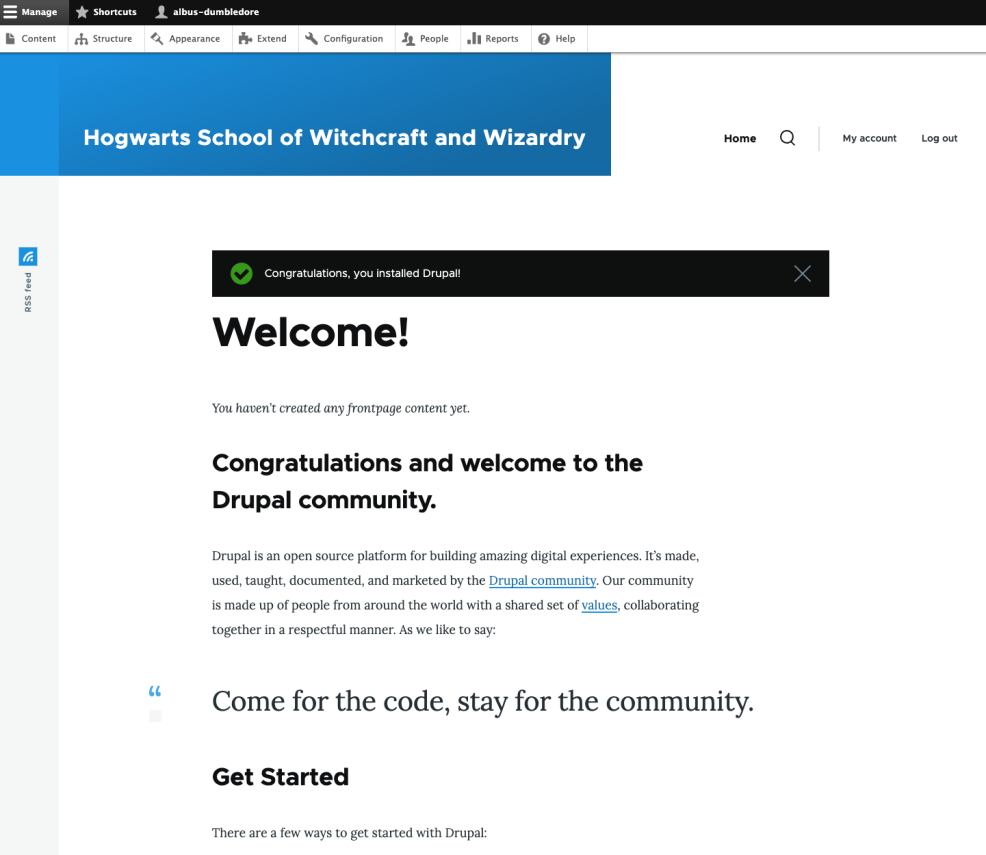
Set up user accounts and add roles
Once Drupal is installed and you complete the steps from the previous section, it’ll take you to your website’s main page with a welcome message and tips on getting started:
Before getting into building the site itself, there’s a little housekeeping to do. You’re the admin user, so making your life easier for back-end navigation is something that’ll save you a lot of time while building the site.
Let’s add the Admin Toolbar module to give the toolbar drop-down menus more administrative options. You can add the Admin Toolbar via the command line or by downloading the module files via the project page on Drupal’s module search page. We recommend installing modules with Composer, especially when modules have dependencies. Once you’ve done that, click “Extend” in the admin menu at the top of the page and select the Admin Toolbar module to activate it. You can also use Drupal’s module search page to explore any modules you might want to add to your site.
From there, it’s good to set up some governance — additional roles and permissions to allow other team members to access and make changes to the website in alignment with their respective positions. You can add users, roles, and permissions by clicking on the People tab in the toolbar. It’ll bring you to this page:
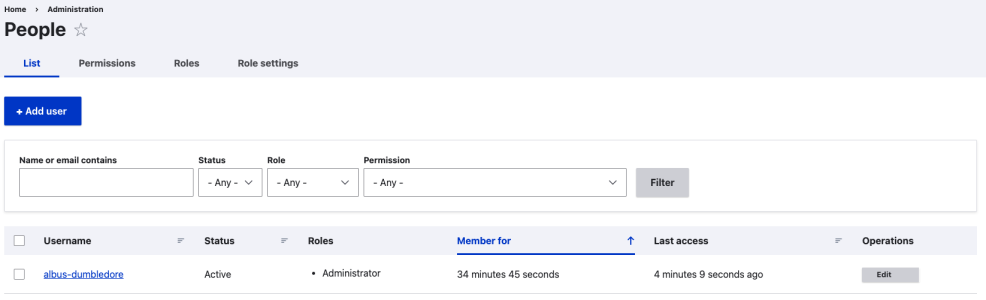
Without getting too far into the weeds, you can do a lot with this section. Add users, granularly select what they can and cannot do (down to the smallest edits), and build customized roles with tailored editorial permissions.
Create your homepage
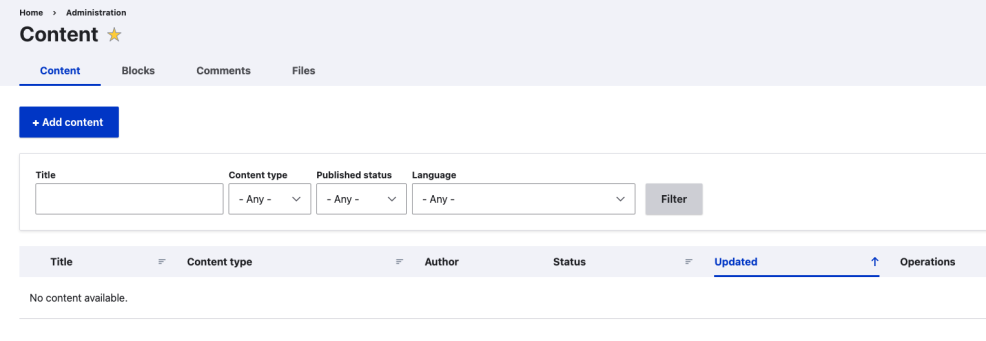
Now that you’ve got your basic housekeeping out of the way, let’s build a homepage. By now you might’ve noticed the ongoing example is for Hogwarts School of Witchcraft and Wizardry. To create a homepage, we’ll start by clicking into the Content tab and selecting “Add content.”
There you’ll see content type options listed and we’re going to select “Basic page.” You’ll enter a page editor where you’ll be able to give the page a title and some body text.
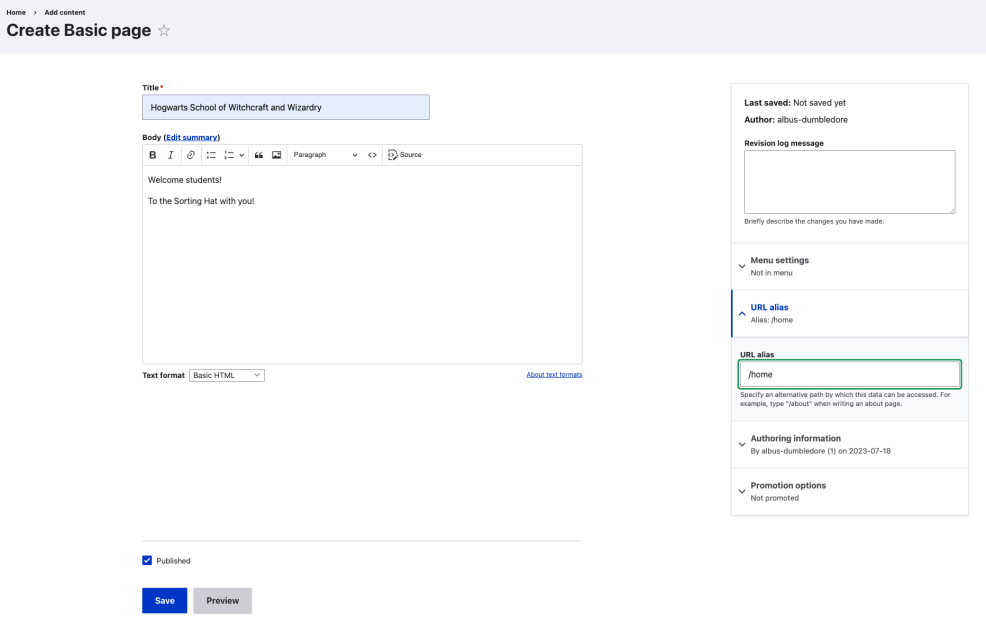
An important part of creating a homepage is the URL alias in the sidebar. To designate this page as a home page, you should label it so. In this example, I simply denote it as “/home” (forward slash required). Once you save the page, that URL alias plays a key role in making this page the homepage. A fun module that demonstrates Drupal’s extensibility is the pathauto module, which, once installed, automates URL aliases for each page you create. That’s just a drop of the ocean of Drupal modules that can veritably extend any way you want, but I digress.
Upon saving your homepage, click the Configuration dropdown in the admin toolbar, select “System,” then “Basic site settings” to enter your /home URL path as the front page.
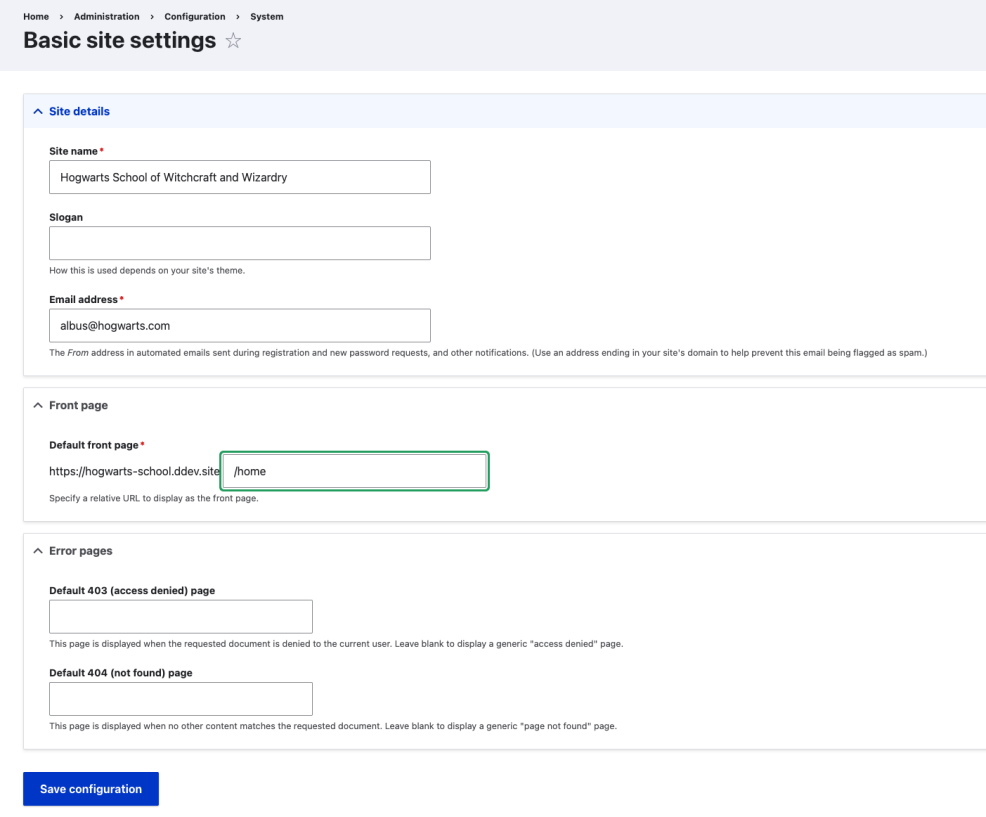
Once that’s saved, it’ll become your default homepage. You can, of course, edit this as you see fit.
Manage the site menu
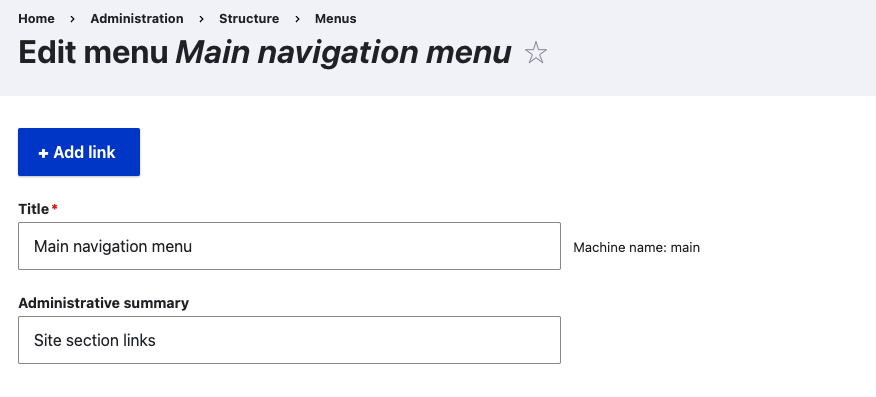
Here’s where you set up the menu that allows end users to navigate your website. Let’s put it together. In the admin toolbar, select “Structure” and click into “Menus.” There are a few default menus, but we’re looking for the Main navigation menu, on which we’ll click “Edit.”
Recall the homepage URL alias “/home.” For the sake of this site menu example, I created four more pages and corresponding URL aliases that we’ll add to our navigation menu:
- Gryffindor House
- /gryffindor
- Slytherin House
- /slytherin
- Hufflepuff House
- /hufflepuff
- Ravenclaw House
- /ravenclaw
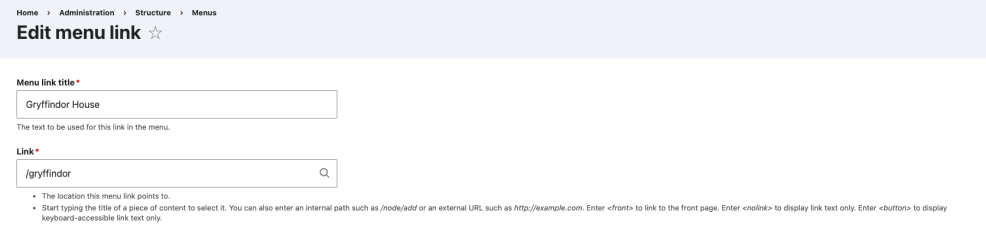
When editing the main navigation menu, you need to add each link individually. The “Add link” button leads you to this page, where you’ll add the menu link title and link path. In this example, I’ve added the Gryffindor House page to the navigation menu via the URL alias “/gryffindor.”
Repeat this process with whatever you feel like having on the main navigation menu, and voila! You’ve got a navigation menu that looks something like this:
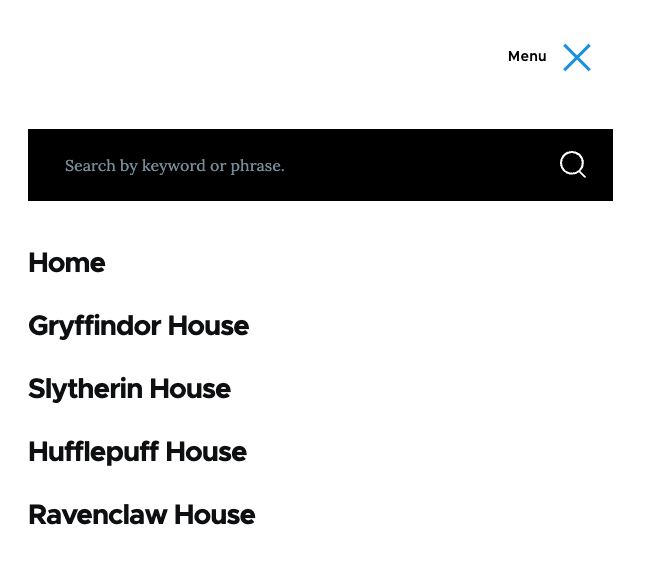
Each of these navigation links will take you to the respective pages. This is a basic example of navigation menu functionality, but, with some exploring, you can do tons to tailor your site’s navigation to your user experience needs.
Add modules
We touched on the Admin Toolbar module earlier, but let’s look a little deeper. After initial Drupal core installation, adding modules allows you to extend and customize the capabilities of your Drupal website beyond what it comes with. With more than 50,000 contributed modules available to choose from, you can tailor your module selection to closely match your website’s goals.
On the admin toolbar, click “Extend” to view a complete list of your Drupal site’s active and inactive modules. From there, you can install, uninstall, and add new modules. We briefly mentioned Drupal module search. When you download a new module from that page, you’ll be able to upload it from the Extend menu when you click “Add new module.” When we mentioned composer being the recommended way of installing modules, it’s really helpful here because the module will be automatically added to the Extend listing, forgoing the previous step altogether!
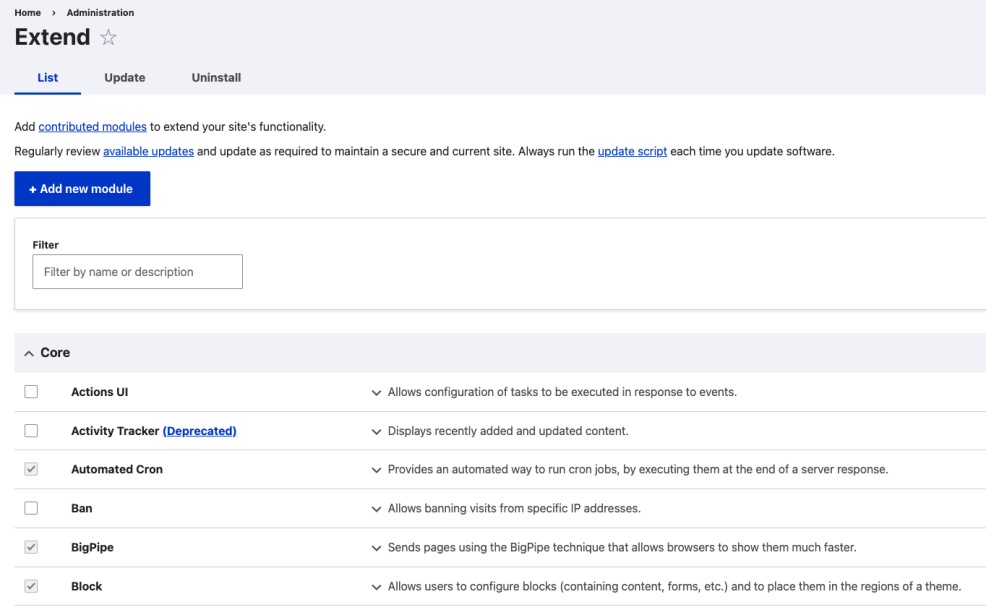
The world is your oyster when it comes to module selection, but it’s important to know exactly what your site goals are and not to overload your site with extraneous or redundant modules.
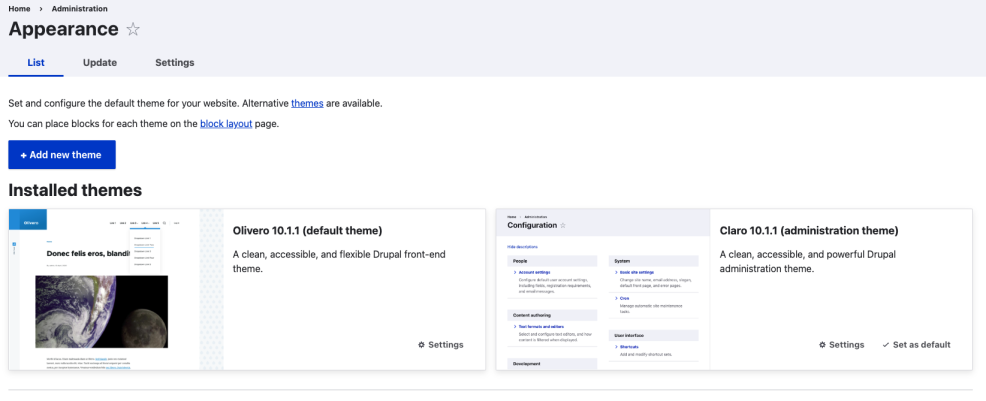
Change themes
Where modules extend site functionality, themes allow you to change the appearance of both the front end and back end of your Drupal website. From the Drupal themes search page, you can look for a front-end theme that fits your organization’s aesthetic from a user point of view and a back-end editor experience to make things sleek for your content editors. Click “Appearance” in the admin toolbar to add new themes, check for theme updates, and edit global, front-end, and back-end theme settings.
Leverage blocks
Blocks are smaller bits of content that can be stacked together to build a page feature. In the Structure dropdown in the admin toolbar, click into “Block layout.” You’ll see the block structure of your Drupal website. It looks like this:
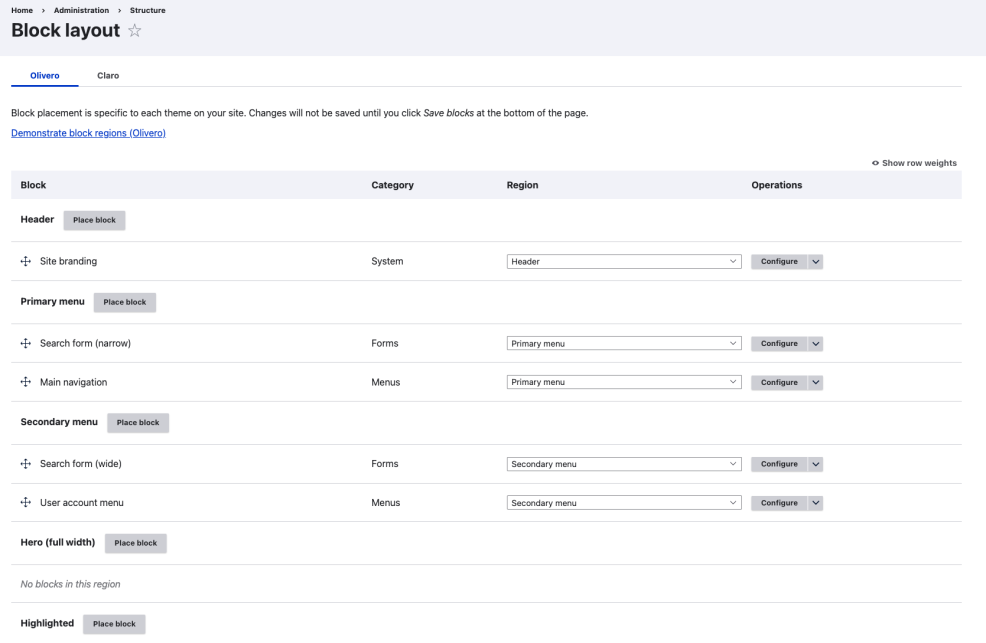
From that menu, you have the power to rearrange blocks, add new ones, and build custom ones. Let’s do some cleaning. Remember the menu navigation and how it has a search bar? I want a cleaner navigation menu, so I’m going to remove the Search form block by click “Remove” under the “Configure” button:

Once I remove that block and refresh the page, the search form is gone and the menu looks a lot cleaner. Blocks empower you to build your website to look and function exactly the way you want. Add, remove, edit, and rearrange blocks and you’ll find no shortage of unique ways to present your Drupal website.
Build content
You’ve already seen an example of building content when we put together our homepage. Additional content types are available via different modules, depending on what you want your site to display. For the sake of practice, let’s create a History of House Gryffindor article. Clicking into the Content tab in the admin toolbar, we’ll add an article:
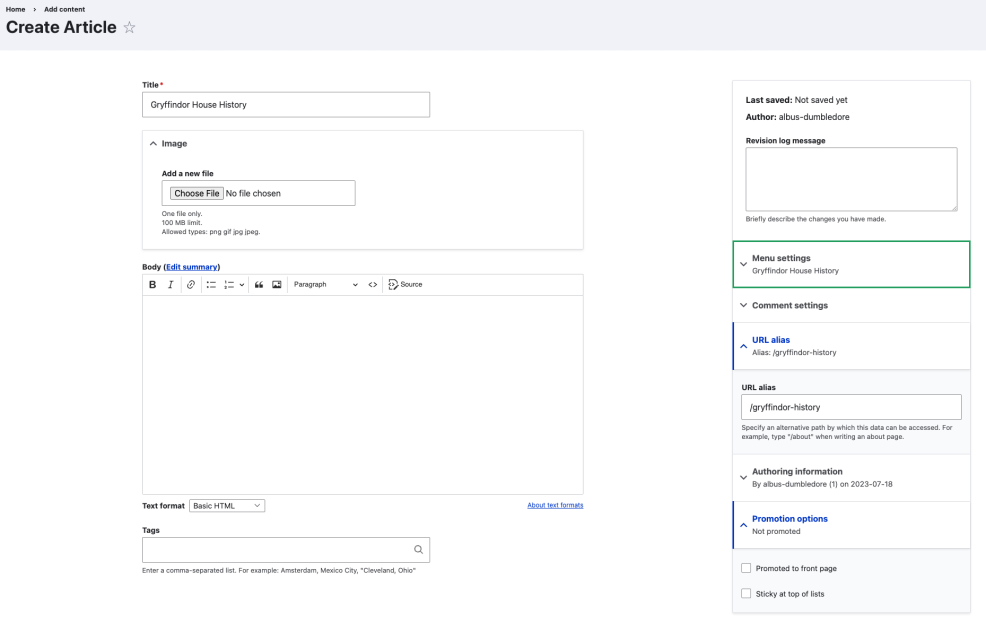
Add the title, image, body content, and URL alias that fits with the page, and save it. Using the instructions from the navigation section, you can put this where you think it would fit best. In this case, it’d make a nice sub-option in the menu under Gryffindor House.

Opening that sub-option would bring you to a separate page that talks about the history of that particular house. Rinse and repeat with any subsequent content you want to create.
Maintenance
As with any technology – CMS or otherwise – keeping ahead of updates and regular maintenance is crucial to keeping your website performing optimally. In the admin toolbar, the Reports dropdown menu allows you to view a full-rounded Drupal site health check. You can view what modules and themes need to be updated, the status of Drupal core updates, and a myriad of other maintenance checks.
Of course, being a part of and following updates from the Drupal community is a wonderful way to stay in the know on all things Drupal. You’ll be part of an extensive, diverse community of like-minded folks who have made it their goal to continuously make Drupal better every day.
Getting started
Alright, it’s your turn! Hopefully, this step-by-step guide gave you a taste of what you can do with Drupal and helped show that it’s far from difficult to use. But, let’s take it a step further. Drupal’s extensibility is what makes it such an attractive option for many of the world’s leading businesses. And we want you to have what they have.
Humble brag here, but Acquia is the number one Drupal contributor on the planet, so we like to think we know what we’re talking about. Drop us a line and we can help start your Drupal project or kick your existing one up a notch! You can learn more about Drupal here, or, even better, get in touch and we’ll show how to make your digital experience dreams a Drupal reality.


